
Whether you need to share files between two office PCs or set up a quick local connection at home, you don't always need an internet connection to link two computers together.
Windows supports several ways to connect two computers directly — from configuring a LAN cable with static IP addresses to using WiFi, Bluetooth, or USB transfer cables. Each method works differently depending on your setup, the file size you need to transfer, and whether you have physical access to both machines.
This guide covers 5 reliable methods to connect two computers on Windows, with step-by-step instructions for each.
1. First method: Connecting two computers via IP address
To connect two computers directly without a router or switch, use an Ethernet crossover cable. If you're connecting through a router or switch, a standard straight-through cable works fine. Most modern NICs support auto-sensing (Auto-MDIX), so a regular cable usually works either way — but if the connection fails, try a crossover cable.
Follow these steps:
Step 1: Open Control Panel: Go to Network and Internet, then Network and Sharing Center, and select Change adapter settings.
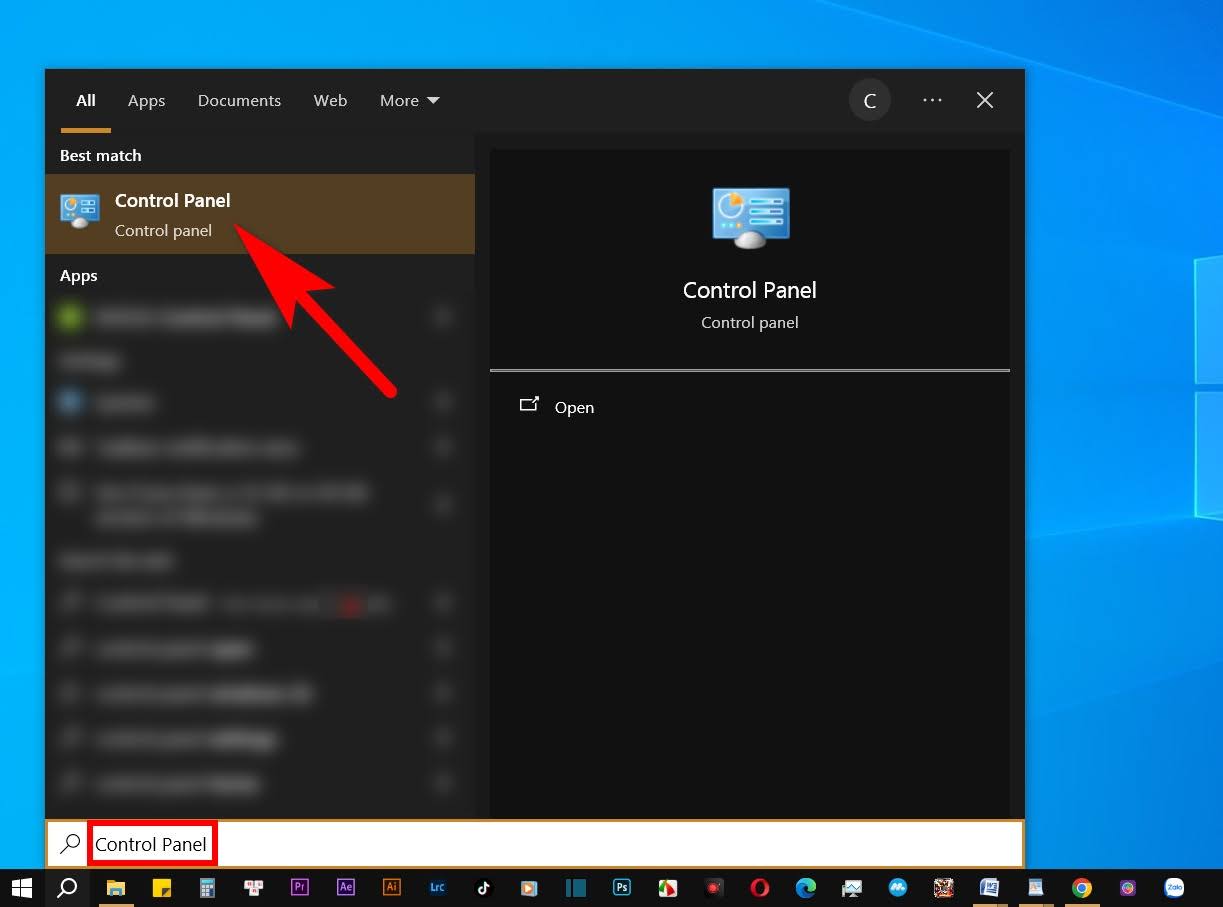
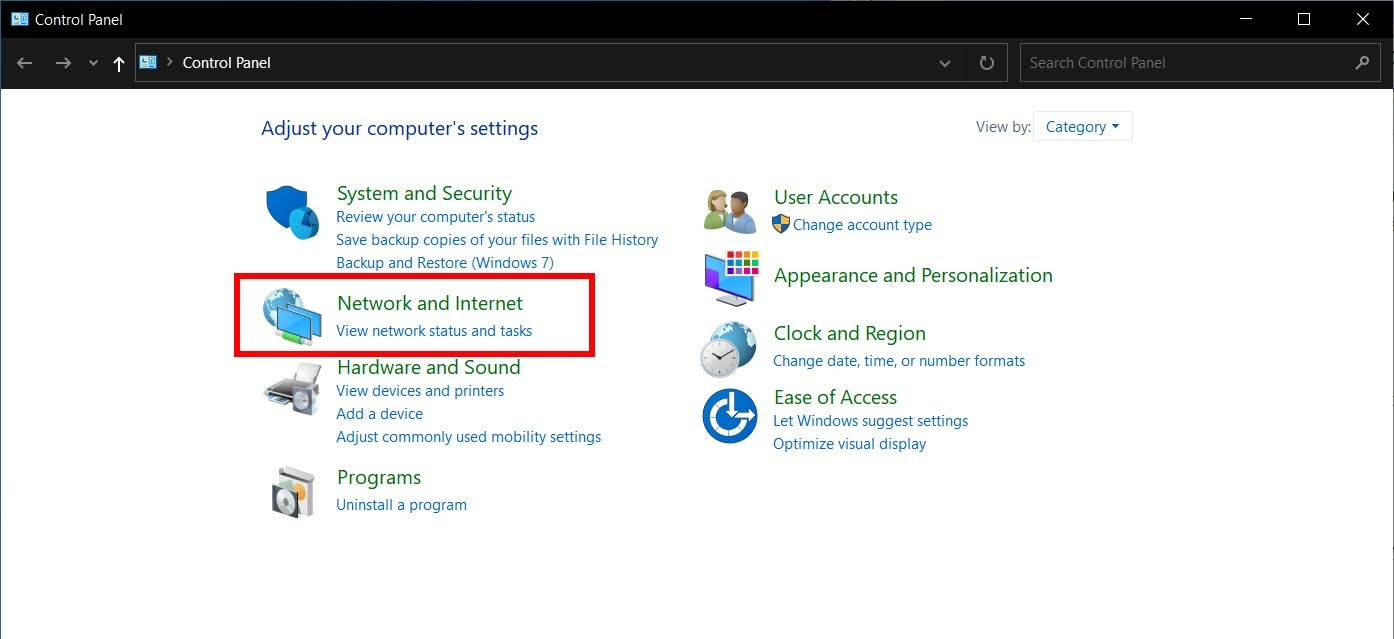
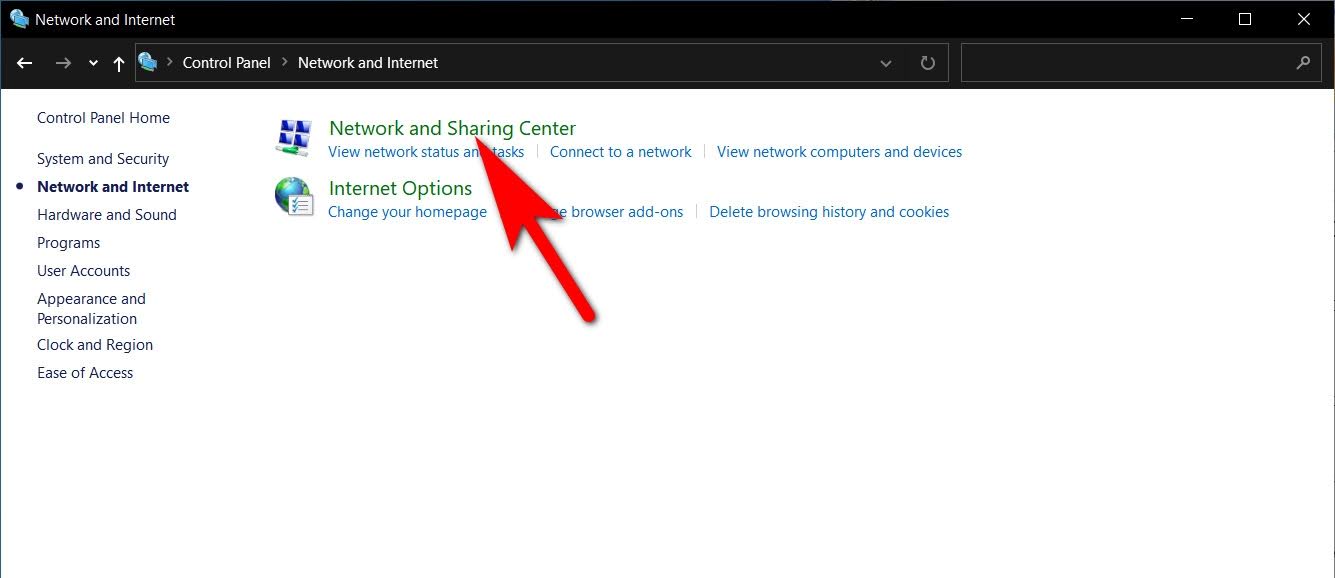
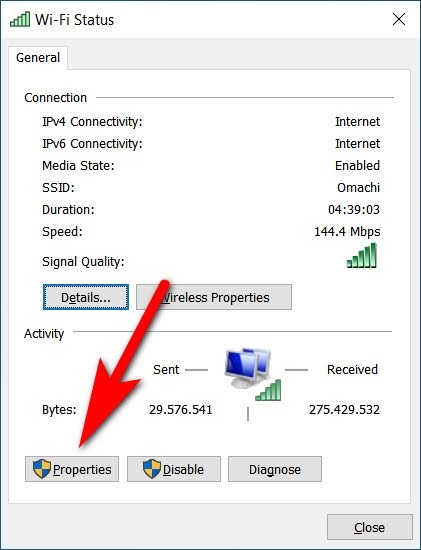
Step 2: Connect to the network and then select Properties
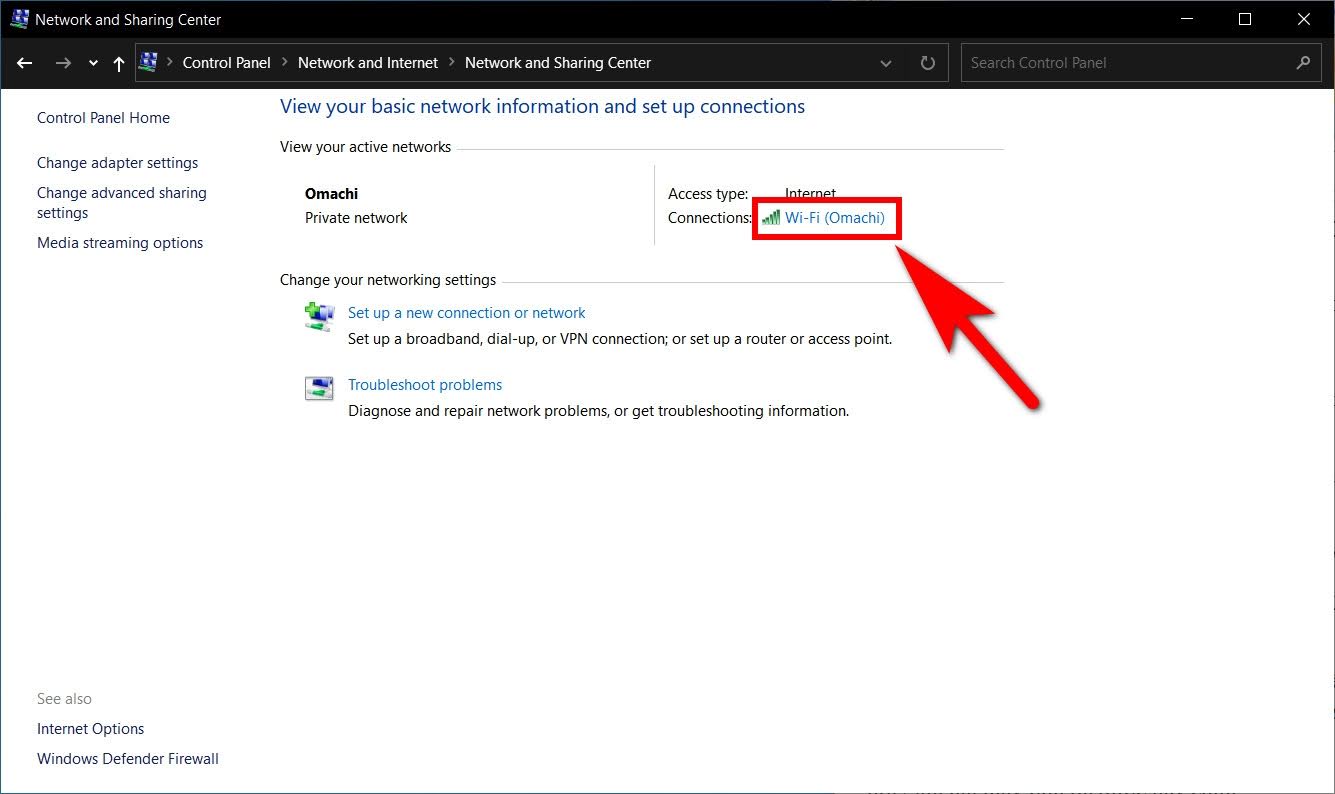
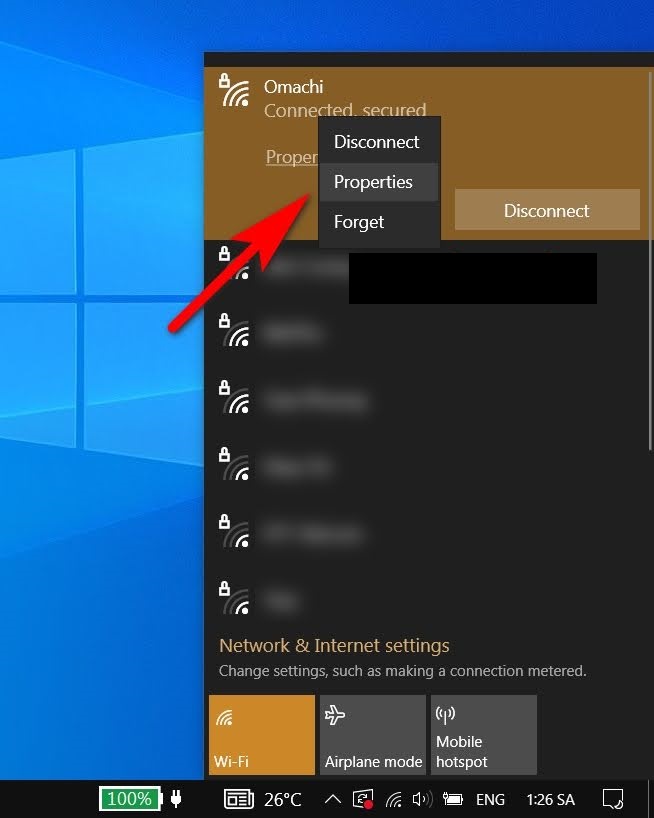
Other ways: You can click on the network icon in the bottom right corner of the screen, right-click on the current network, then select Properties.
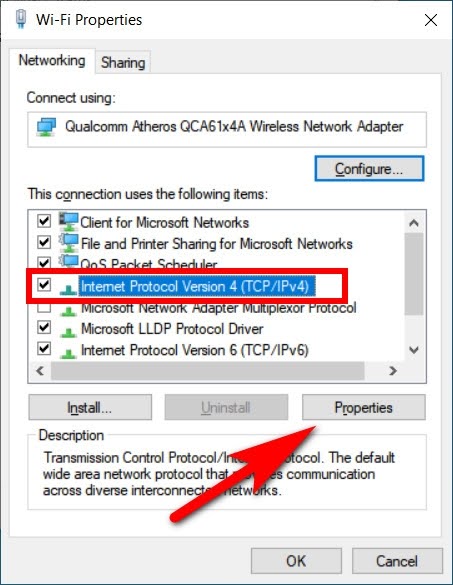
Step 3: Open Internet Protocol Version 4 (TCP/IPv4) settings
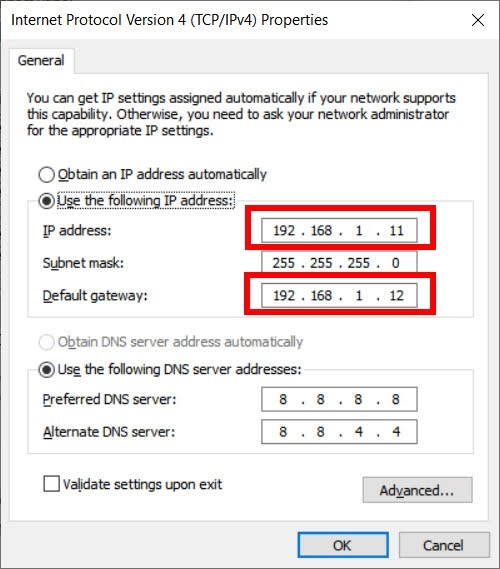
Assign different IP addresses and a subnet mask for each computer within the same subnet range, for example:
- Computer 1 IP Address: 192.168.1.1
- Computer 2 IP Address: 192.168.1.2
Enter “Subnet mask” và “Default gateway” as below to connect data across 2 device.
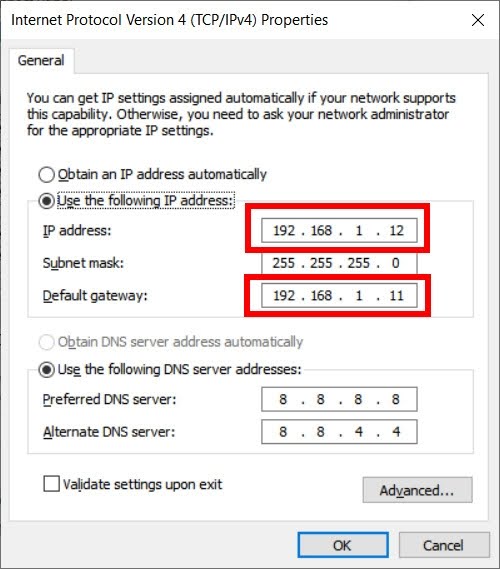
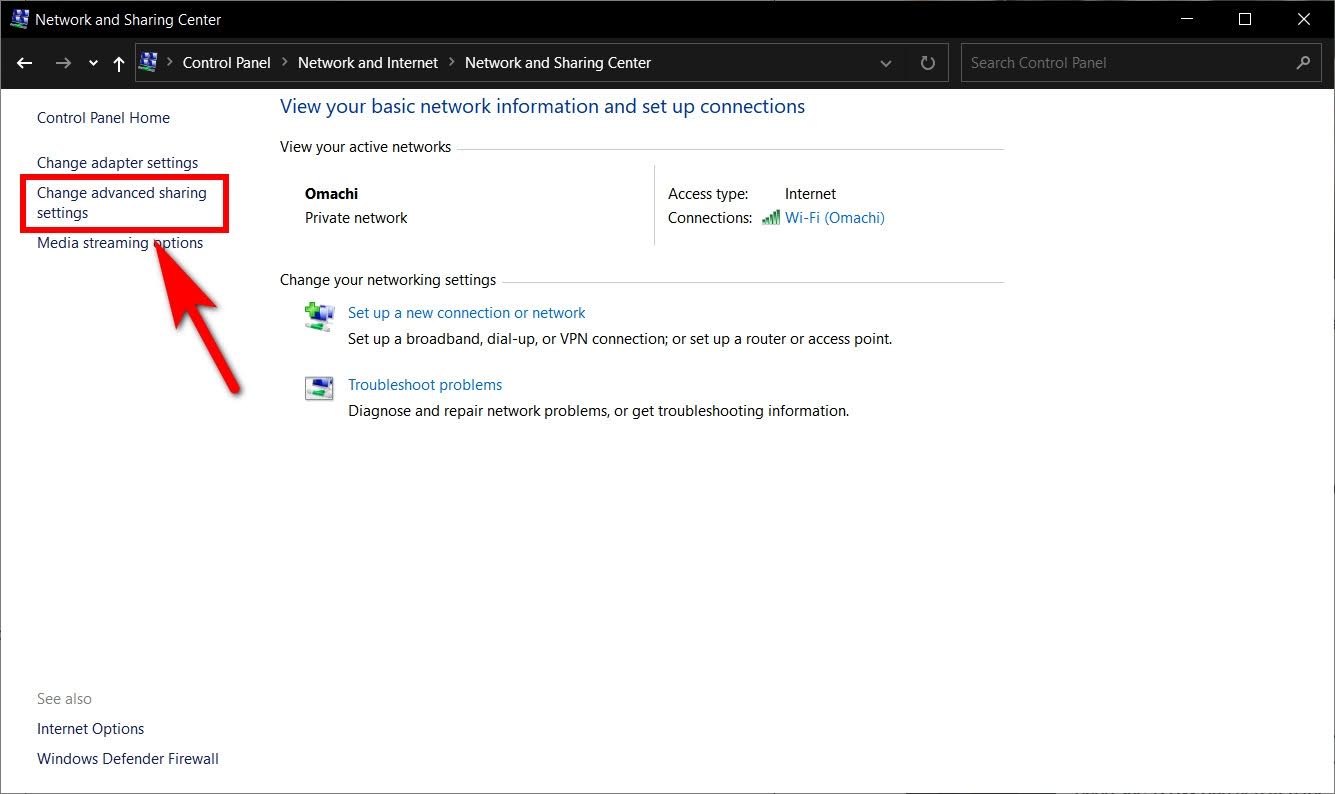
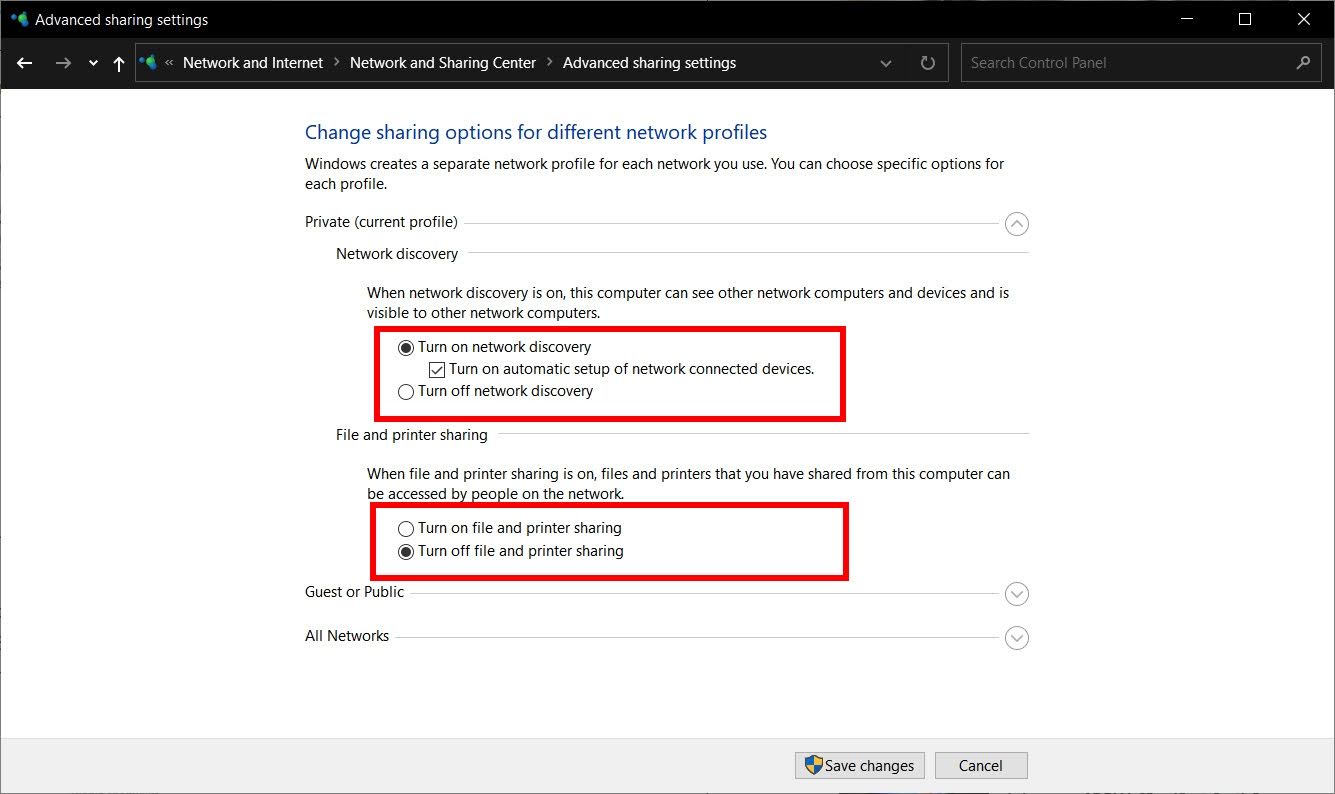
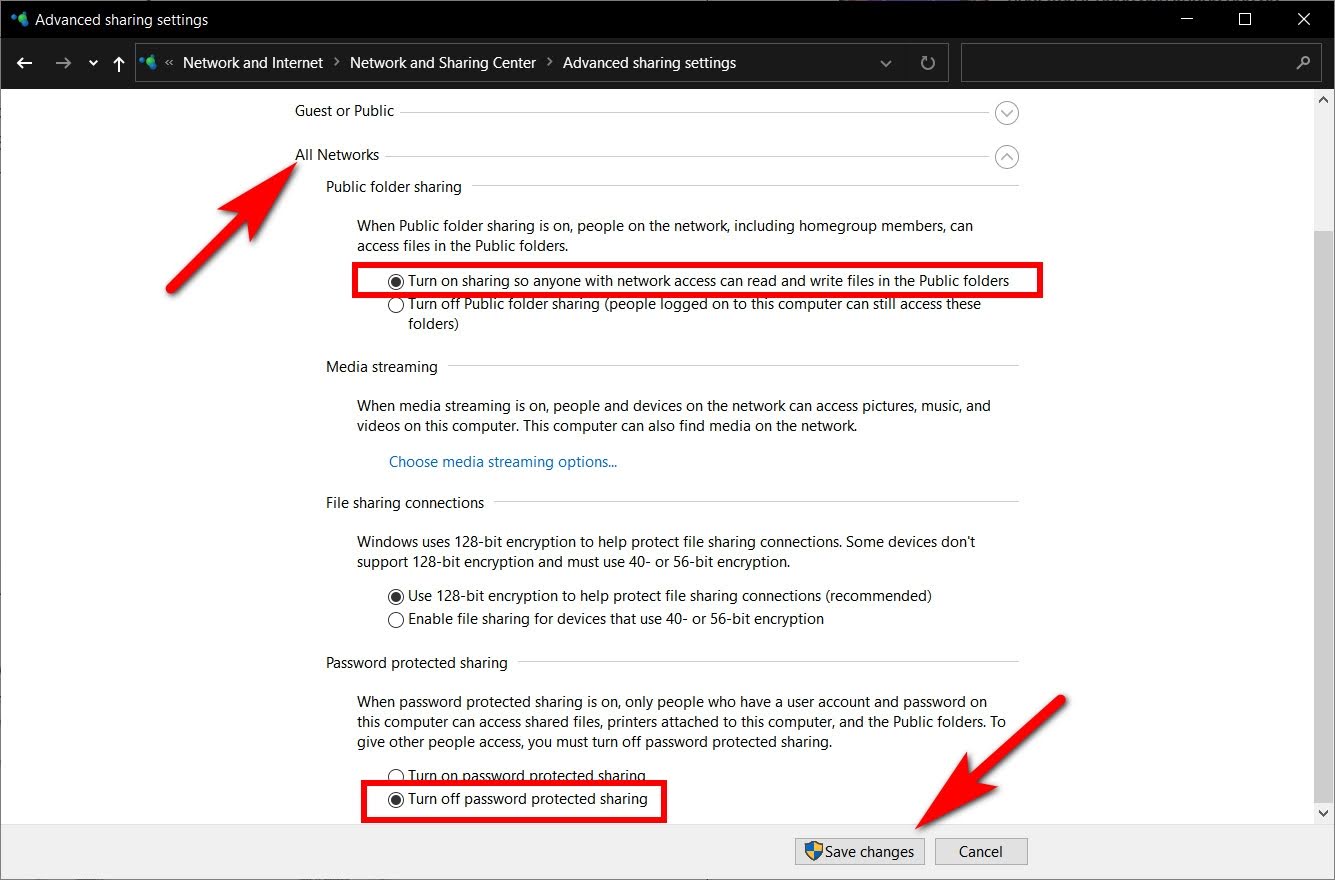
Step 4: Verify Connection: Open Command Prompt, ping the other computer’s IP address, and go to Change advanced sharing settings to enable network discovery and disable file and printer sharing as needed.
2. How to connect data accross two device via IP Address
After completing the connection of 2 computers via IP address, continue with the steps to share computer data.
Step 1: Right-click on the folder you need to share, select Properties.
Step 2: Window My Share Files Properties appears, select Sharing. Continue clicking Sharing. Besides, you can press Advanced Sharing for advanced settings.
Step 3: Select the down arrow in the right corner of the item, select Everyone to share data between devices. Click Add to add the connected computer group to the list.
Step 4: Press access to allow other computers to use the data. In there:
-
Read: Visitors are only allowed to view or copy content.
-
Read/Write: Guests are allowed to edit folders.
Step 5: Click Share to share data, then tap Done.
3. Some other ways to connect data across two devices
Depending on your needs, you can connect 2 computers in different ways. Below are some connection methods you can refer to and implement:
3.1. Method 2: Connect via WiFi (Same Network)
Both computers must be connected to the same WiFi network. No cable needed.
- Step 1: On both PCs, go to Settings → Network & Internet → Advanced network settings → Advanced sharing settings. Under Private Network, enable Network Discovery and File and Printer Sharing.
- Step 2: On the PC you want to share files from, right-click the folder → Properties → Sharing → Share. Select Everyone from the dropdown, click Add, then Share.
- Step 3: On the second PC, open File Explorer → Network (left panel). The first PC should appear. Double-click it and enter the password if prompted to access the shared folder.
- Note: If the other PC doesn't appear under Network, make sure both are set to Private network (not Public). Go to Settings → Network & Internet → [your WiFi name] → Network profile type → Private.
3.2. Method 3: Connect via USB Transfer Cable
Important: You must use a USB transfer bridge cable (also called a USB networking cable or USB-to-USB data transfer cable) — not a standard USB A-to-A cable. Plugging a regular USB cable between two computers will not work and can damage the USB ports on both machines. USB transfer cables are available on Amazon for around $15–30 and come with their own software.
Step 1: Use a USB - USB cable to connect 2 computers together by plugging 1 end into the first computer's USB port and the other end into the second computer's USB port.
Step 2: Press Network and Sharing Center to connect to the Internet and share LAN via USB port.
Step 3: If your computer is on an old operating system, you must install drivers and software before sharing data.
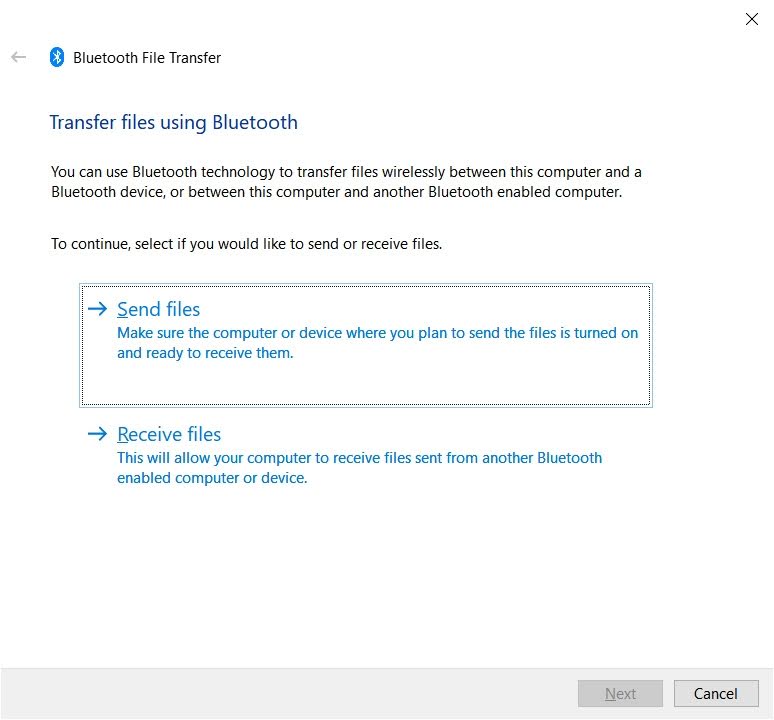
3.3. Method 4: Connect via Bluetooth
Step 1: Open Setting On both computers, check if the Bluetooth feature is turned on. Let's turn on Bluetooth Go up and search for the other device.
Step 2: To pair two devices together, you must enter the pin code to check if it matches or not.
Step 3: Once the device is connected, you can share data between the two devices.
3.4. Method 5: Connect via remote desktop software
Remote desktop tools let you access and control another PC over the internet or a local network — useful for remote work, IT support, or accessing files on another machine without being physically present.
Option A: Windows Remote Desktop (Built-in, free)
Best for: Connecting two Windows PCs on the same network or via internet.
- Step 1: On the PC you want to connect to, go to Settings → System → Remote Desktop and toggle Enable Remote Desktop on. Note the PC name shown on this screen.
- Step 2: On the other PC, press Windows + R, type
mstsc, and press Enter. Enter the PC name or IP address from Step 1, then click Connect. Sign in with the target PC's credentials.
Option B: AnyDesk (Free for personal use)
Best for: Quick remote access without network configuration.
- Step 1: Download and install AnyDesk on both computers from anydesk.com.
- Step 2: On the target PC, note the 9-digit AnyDesk ID shown on the home screen.
- Step 3: On the other PC, enter that ID in the search bar and click Connect. The target PC will receive a request — click Accept to allow the connection.
Option C: TeamViewer (Free for personal use)
Best for: Cross-platform remote access (Windows, Mac, Linux, mobile).
- Step 1: Download TeamViewer from teamviewer.com and install on both PCs.
- Step 2: On the target PC, note the ID and Password shown on the main screen.
- Step 3: On the other PC, enter the target PC's ID under Connect to Partner, click Connect, then enter the password when prompted.
Note: Remote desktop software requires an internet connection on both machines (except Windows RDP on local network). For offline file sharing, use Methods 1–4.