Proxy and Firewall are essential configurations that help secure your Internet connection and enhance online safety. In this guide, Hidemyacc provides step-by-step instructions on how to check your Proxy and Firewall settings to ensure seamless and secure access.
1. Understanding the role of a firewall
A firewall serves as a protective barrier between a trusted internal network and external networks like the Internet. It helps prevent unauthorized access, cyber threats, and malicious attacks, safeguarding your devices.
2. Steps to check firewall settings
Firewalls are vital for protecting your data and preventing access to harmful websites. However, in some cases, when using a proxy, your firewall may detect it as a potential risk and block Internet access. If you encounter connectivity issues with a proxy, follow these steps to check and modify your firewall settings:
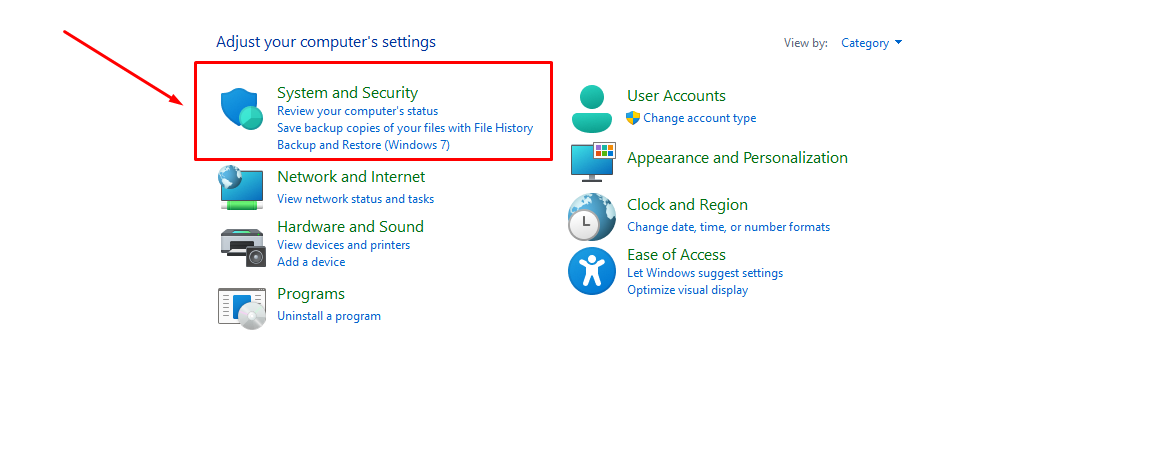
Step 1: Open Control Panel and select System Security.
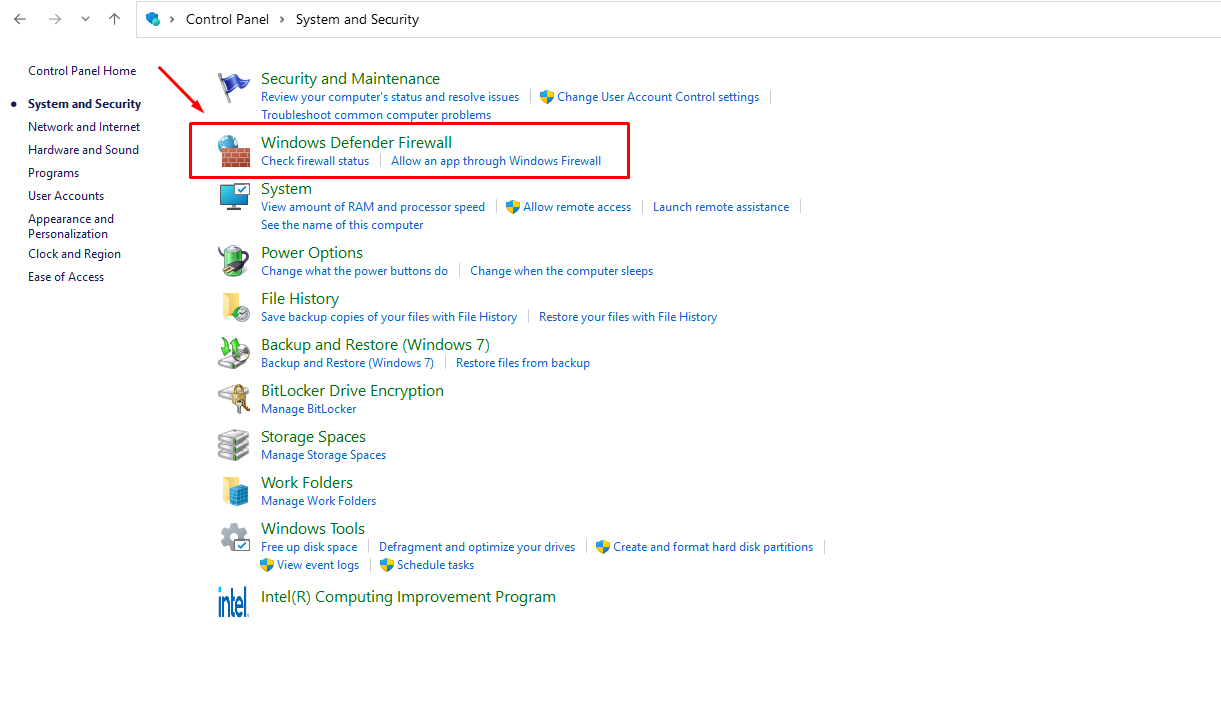
Step 2: Choose Windows Defender Firewall.
Step 3: Select Turn Windows Defender Firewall on or off. Here, turn off both options.
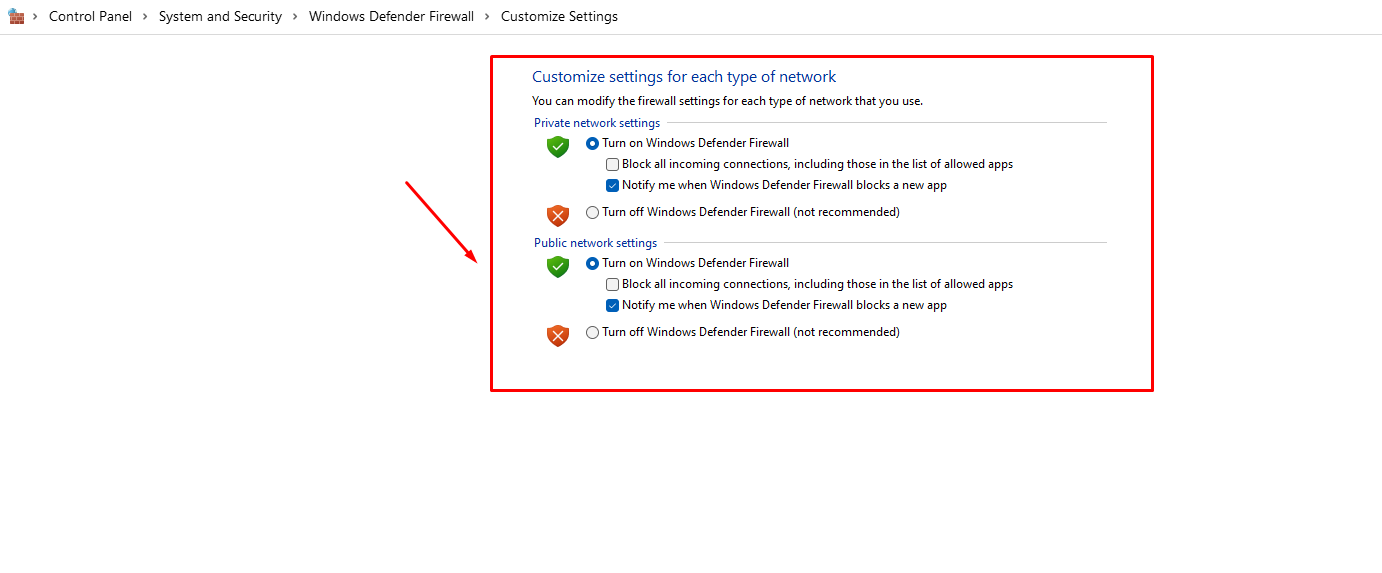
This process will guide you through checking and, if necessary, turning off your firewall on a Windows computer. However, if disabling the firewall does not resolve proxy connectivity issues, additional troubleshooting may be needed.
3. Checking proxy settings
If your proxy remains unable to connect after firewall adjustments, several common causes might be at play:
-
Overloaded server: Proxy servers can become overloaded if too many users access them simultaneously.
-
Expired proxy: If you’ve exhausted your proxy's data allowance or it has expired, Internet access will be blocked.
-
Incorrect proxy configuration: Ensure the proxy settings, including username, password, and proxy type, are correctly formatted.
-
Conflicts with other VPN software: Check for compatibility issues with other VPNs installed on your device.
-
Blacklisted proxy IP address: If the proxy IP is blacklisted by the website you’re trying to access, connectivity will be restricted.
At this point, verifying that your proxy settings are correctly configured will help ensure uninterrupted service.
4. How to check proxy settings
To check your Proxy settings, follow these steps:
Step 1: Open Settings on your computer.
Step 2: Select Network & Internet.
Step 3: In the Proxy section, confirm that your proxy settings, such as format and credentials, are correctly configured.
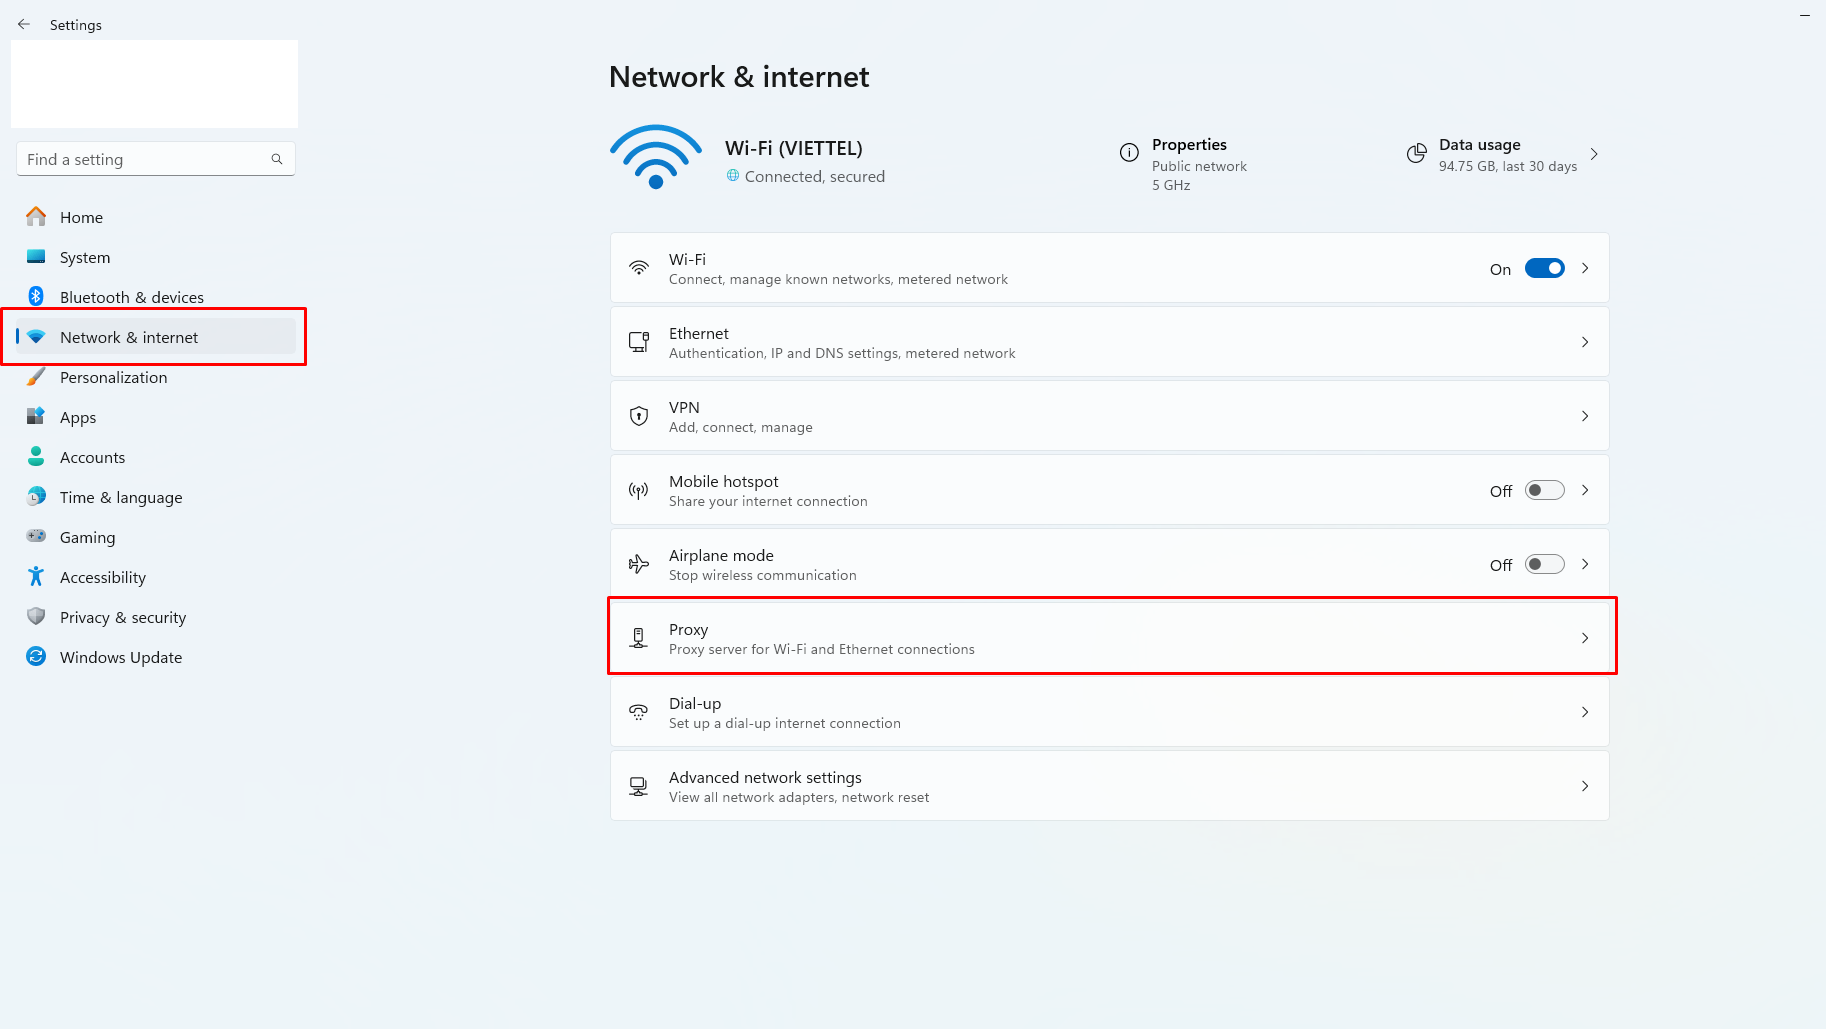
This guide aims to help you confidently manage your Firewall and Proxy settings for optimized security and performance. For further assistance, feel free to reach out to Hidemyacc support.
4. Chrome proxy settings - Step by step
Besides using intermediary Proxy sites, you can also directly change the default Proxy on your browser to access blocked websites.
The specific steps are as follows:
-
Step 1: Access ProxyNova, select any IP address with the lowest latency, then copy the Proxy IP and Proxy Port information.
-
Step 2: In Google Chrome, click the three-dot icon in the right corner, then select Setting.
-
Step 3: Select item System, then click Open proxy settings on computer.
-
Step 4: In section Manual proxy setup, turn on Use a proxy server. Enter Proxy IP and Proxy Port, then press Save to save.
5. Configuring Proxy on Hidemyacc Profiles
The Hidemyacc Antidetect Browser enables users to create and manage multiple accounts on the same device securely by generating unique browser profiles. Each profile can be customized with specific browser fingerprint parameters, including OS, browser type, screen resolution, hardware concurrency, and device memory.
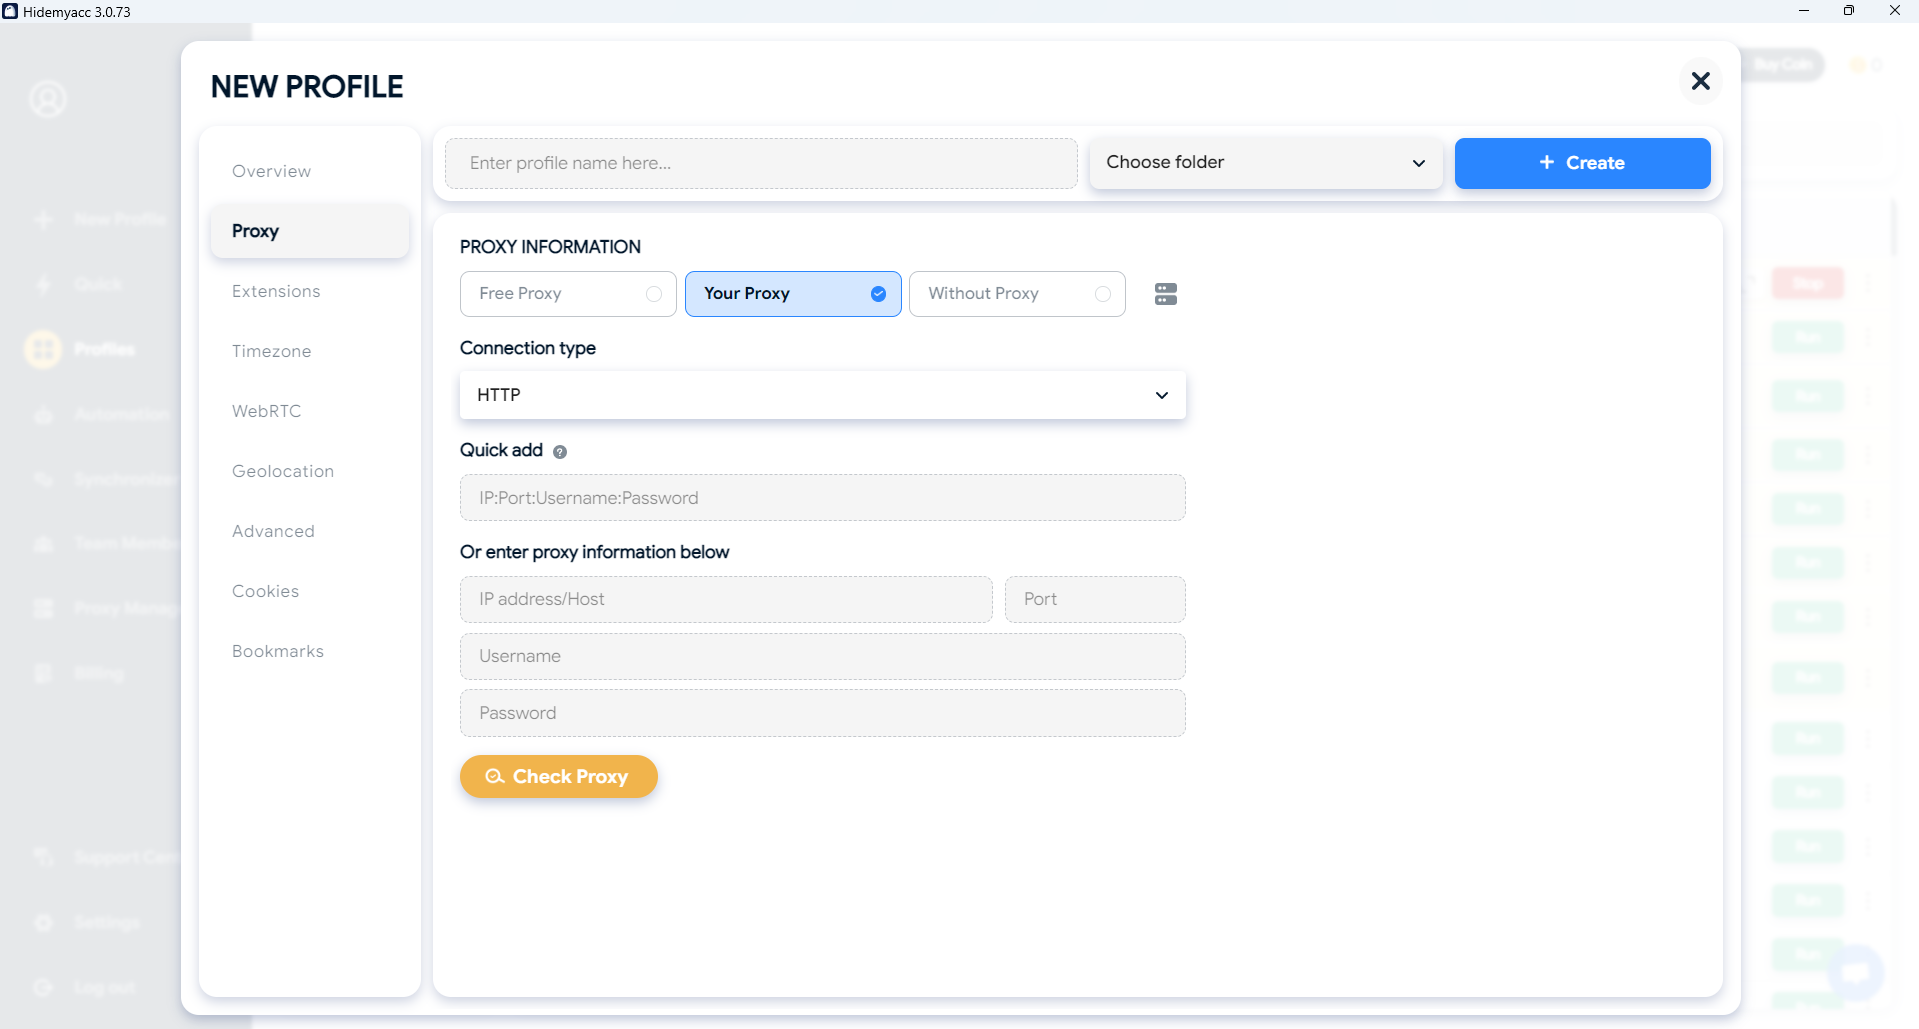
In addition, you can easily configure proxies on Hidemyacc profiles to change the IP address for each profile. Hidemyacc supports various proxy types, making it simple to adjust IP addresses across different profiles.
Follow these steps to configure a proxy on your Hidemyacc profile:
- Click the + New Profile button.
- Select the Proxy tab.
- Choose the connection type you wish to use for your profile.
- Enter the proxy’s IP, Port, Username, and Password.
- Press Check Proxies to verify the proxy connection.
- Click Create to finalize and save the profile.
This process will allow you to manage multiple accounts with unique IP addresses effortlessly.
