Are you looking for a simple way to enable a VPN on your iPhone, Android, or computer? This article from the Hidemyacc Antidetect Browser will guide you step-by-step on how to set up a VPN on popular devices, helping you protect your privacy and enhance your browsing security. Discover it now!
1. How to Enable a VPN on an iPhone
To easily enable a VPN on your iPhone, follow the steps below:
Step 1: Go to “Settings”, then select “General” and tap on “VPN & Device Management.”
Step 2: Tap “VPN”, then select “Add VPN Configuration.”
Step 3: Enter all the required configuration information, then tap “Done.” Finally, turn on the switch to connect to your private virtual network.

>>>> SEE MORE: What is a VPN? Benefits, setup, and detailed installation guide
2. How to Enable a VPN on Android
Enabling a VPN on Android is very simple. Below is a detailed guide on how to set up a VPN manually:
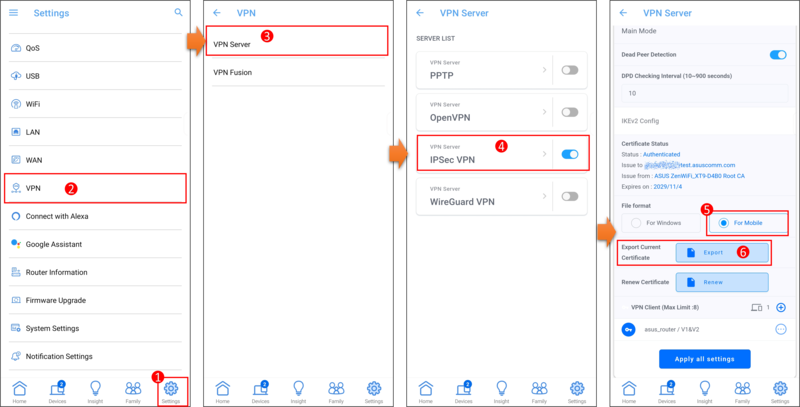
Step 1: Open Settings on your phone, then select Network & Internet and find the VPN section. Tap the “+” icon (add VPN) to enter information for the new connection.
Step 2: Enter the server information you want to connect to, then tap Save to return to the VPN list.
Step 3: Select the VPN connection you just created and tap Connect to start using it.
Step 4: To turn off the VPN on your Android phone, simply select the VPN name again and tap Disconnect.
3. How to Set Up and Enable a VPN on a Windows 10 Computer
Below is a step-by-step guide to setting up and enabling a VPN on a Windows 10 PC:
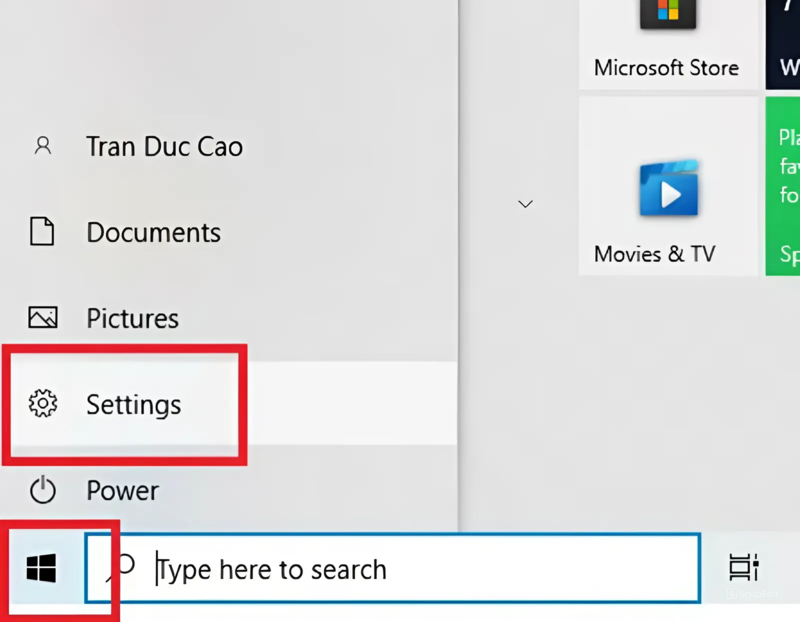
Step 1: Click the Start button on the main screen, then select Settings.
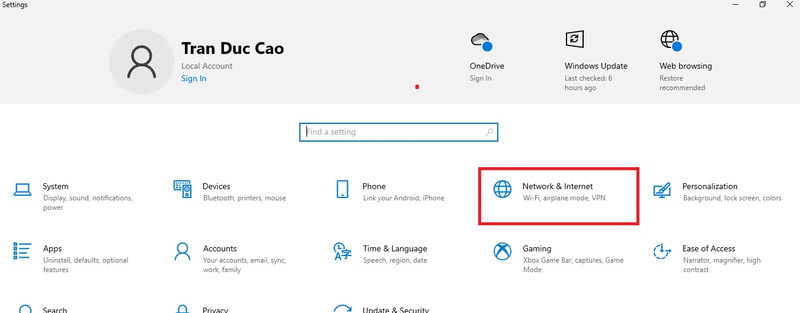
Step 2: In the Windows Settings window, select Network & Internet.
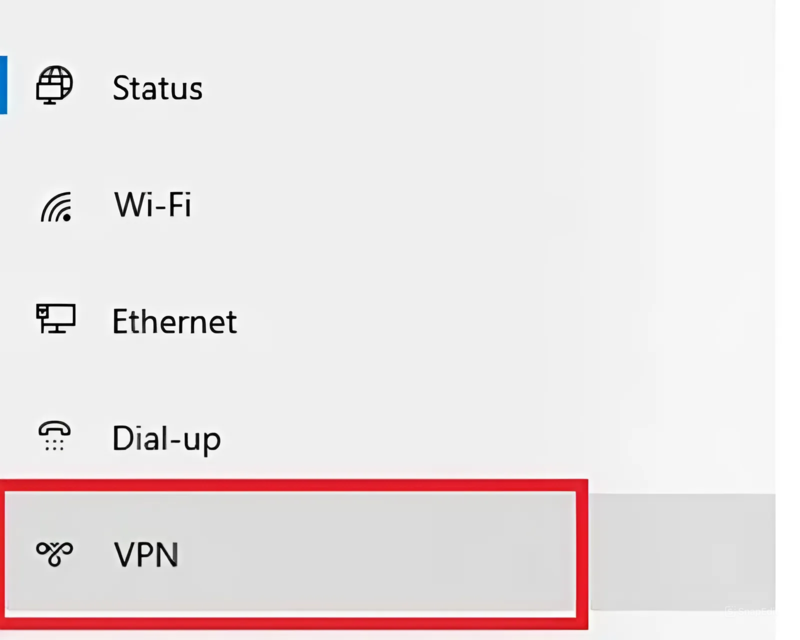
Step 3: Next, select VPN from the list on the left.
Step 4: In the VPN setup section, click Add a VPN connection.

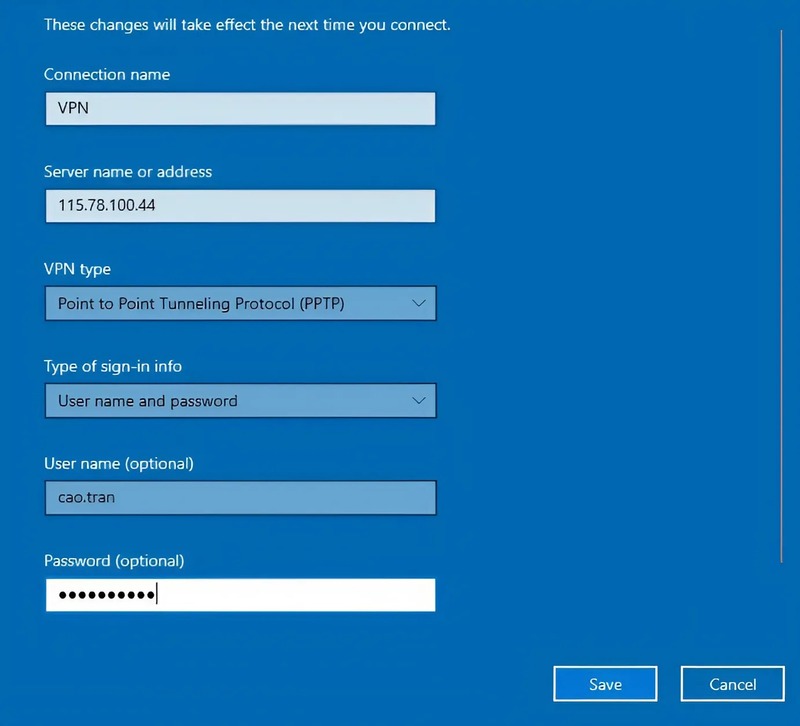
Step 5: Enter the required information in the Add a VPN connection interface:
-
VPN provider: select Windows (built-in).
-
Connection name: give a name to the VPN connection you want.
-
Server name or address: enter the server name or IP address (e.g., 115.78.100.44).
-
VPN Type: choose PPTP (Point to Point Tunneling Protocol). Depending on the provider, you may choose from common protocols such as PPTP, L2TP/IPSec, SSTP, or OpenVPN.
-
Type of sign-in info: select Username and password.
-
User name: enter your username (e.g., cao.tran).
-
Password: enter your password (e.g., abcd@1234).
After entering all the information, click Save to store the settings.
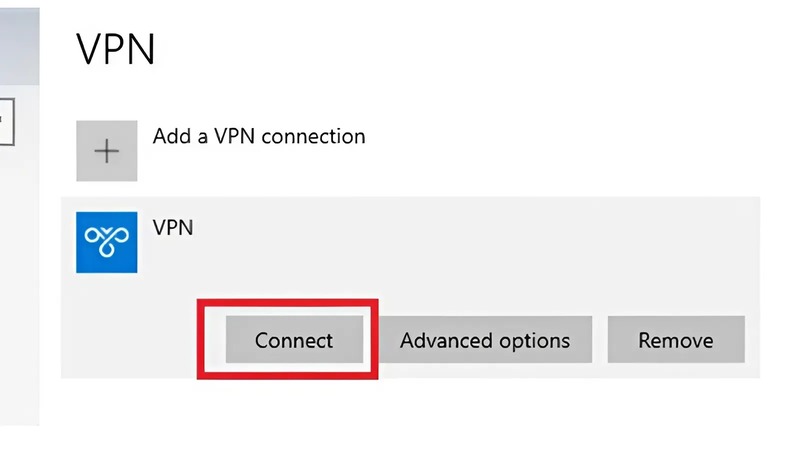
Step 6: Once the setup is complete, connect to the VPN. In the VPN list, select the connection you want and click Connect. You can also click the network icon in the corner of the screen, choose the VPN you want to connect to, and then click Connect.
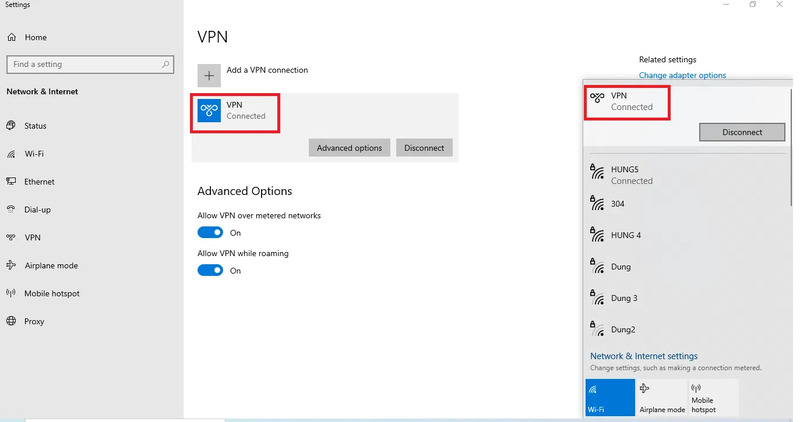
Step 7: If the VPN status displays “Connected,” it means you have successfully connected.
>>> RELATED ARTICLE: How to change VPN on phones and PCs for effective IP masking
4. How to Enable a VPN on a MacBook Laptop
To set up and enable a VPN on a Mac, follow these steps:
Step 1: On your Mac, open the Apple menu and select System Settings. Then click Control Center in the sidebar (you may need to scroll down to find it).
Step 2: Go to the Menu Bar Only section, click the dropdown menu next to VPN, and choose one of the following:
- Show VPN status in the menu bar: Select Show in Menu Bar.
- Hide VPN status in the menu bar: Select Don’t Show in Menu Bar.
Note: If you have not set up a VPN on your Mac yet, this option may not be available.
Step 3: To quickly remove the VPN status icon from the menu bar, hold down the Command key and click the icon, then drag it out of the menu bar.
Besides how to enable a VPN on a MacBook, Hidemyacc also guides you through other helpful actions to make usage easier.
1. Connect and Disconnect from a VPN:
- On your Mac, click the VPN icon in the menu bar.
- Select the VPN to connect or disconnect.
2. Show or Hide the Connected Time:
- Click the VPN icon in the menu bar.
- Then choose one of the following:
- Show connection time: Select Show connection time to enable the checkmark.
- Hide connection time: Select it again to remove the checkmark.
3. Show or Hide Connection Status:
- Click the VPN icon in the menu bar.
- Choose one of the following:
- Show connection status: Select Show status while connected to enable it.
- Hide connection status: Select it again to disable it.
Knowing how to enable a VPN on iPhone, Android, and computers is an essential step in protecting your online privacy and securing your personal information. With the detailed instructions above, you can easily set up a VPN connection based on your needs.
However, for those who frequently work in the MMO field and need to manage multiple accounts across different platforms, using a Proxy combined with the Hidemyacc Antidetect Browser is an optimal solution. This browser not only helps you stay anonymous effectively but also allows you to control and adjust your digital fingerprint, reducing the risk of detection. Try it today to protect your accounts and online activities!
>>> RELATED TOPICS: