DNS blocks ads is a smart solution that helps improve users' web surfing experience on phones and computers. Advertisements not only make many users feel annoyed, but also slow down users' information access speed. So how to block ads on phones and computers using DNS? Let's go together Hidemyacc Find out in the article below!
1. Instructions to change DNS to block ads on Android
Phones using the Android operating system are known for their customization capabilities and integration of many smart functions. When using an Android phone, you can easily block DNS advertising simply by performing the following steps:
Step 1: Open Setting - Select item Connect and Share - Private DNS
Step 2: Select item Private DNS provider host name (hostname given by personal DNS provider) - Enter the DNS address Block ads as follows:
-
One.one.one.one
-
Dns.adguard.com
Step 3: If you successfully log in, your phone will not be bothered by online ads.
2. How to change DNS to block ads on IOS
If you are using an iOS phone, you can change DNS to block ads by following these steps:
Step 1: Open Setting - select Wi-Fi (Wi-Fi network connection in use) - open Configure DNS to change DNS on the system.
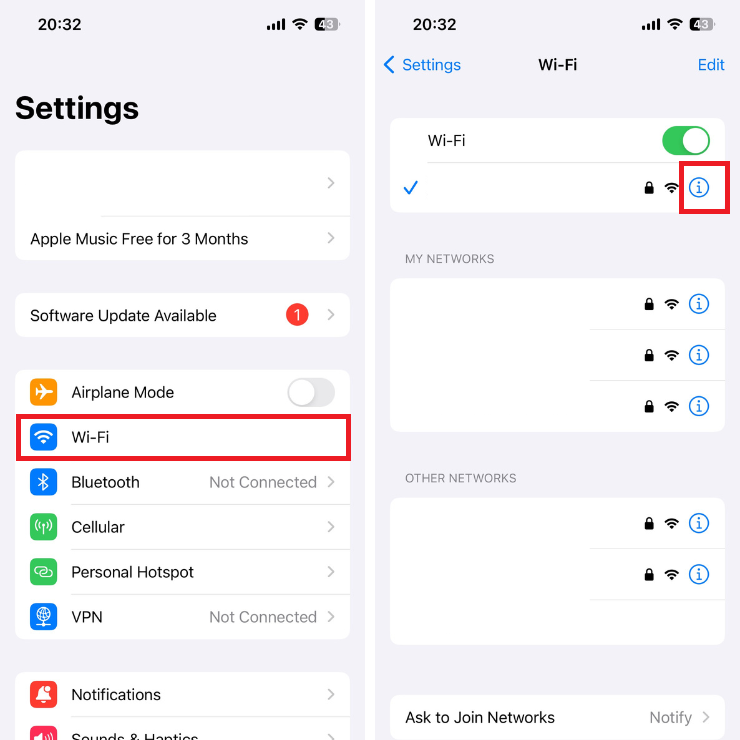
Step 2: Select from item Configure DNS - select mode Handmade or alternatively select the item Add server - Enter ad-blocking DNS or:
-
One.one.one.one
-
Dns.adguard.com
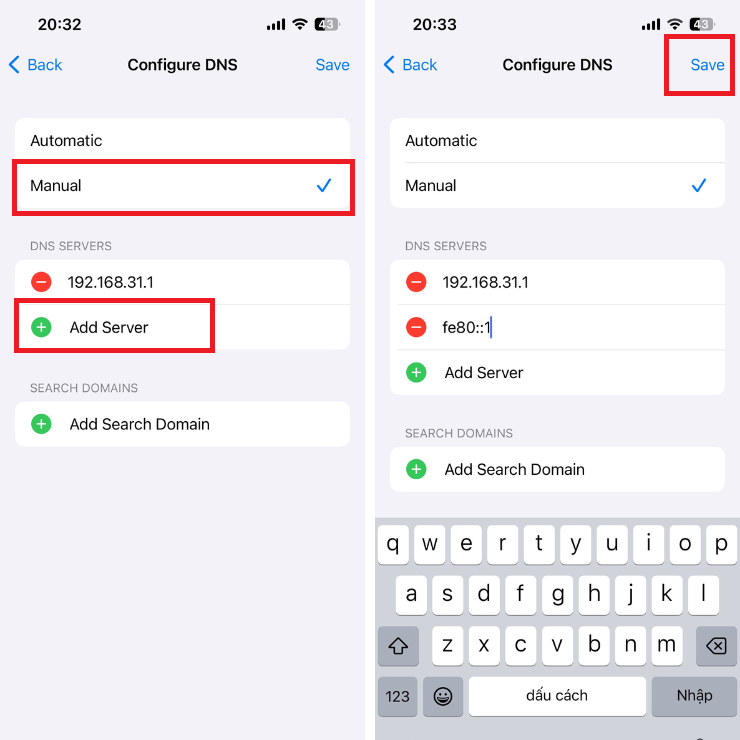
Step 3: Press Save to complete registration (this way you can change DNS to block ads on iPhone and iPad using the iOS operating system).
>>> Learn More: Understanding DNS: The Backbone of Your Online Experience
3. Change DNS to block Youtube ads on Windows
Not only on phones, the ad blocking DNS utility is also used to block YouTube ads on Windows. Changing DNS to remove ads on YouTube helps you have a seamless video viewing experience without being disturbed.
Before using DNS to block ads, you need to change your device's IP address in the following way:
-
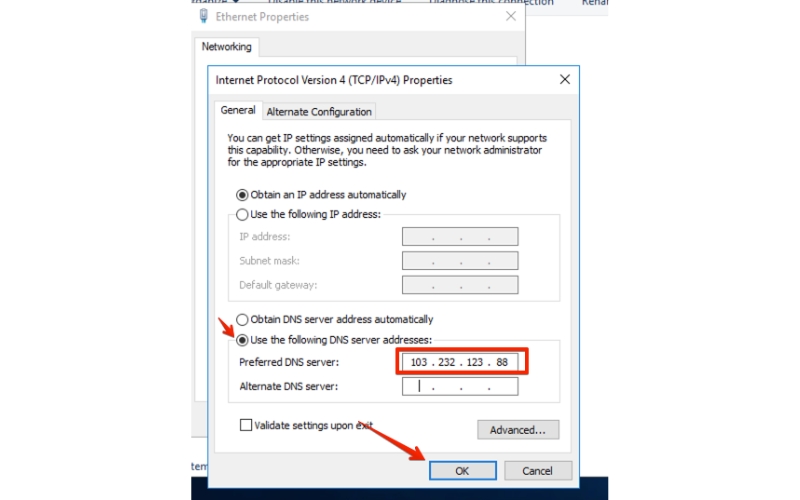
Primary DNS IPv4: 103.232.123.88
-
Secondary DNS IPv4: 45.122.221.222
-
DNS IPv6: 2401:78c0::652
Step 1: Access configuration Network The right side is the screen
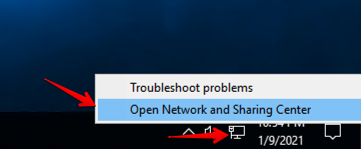
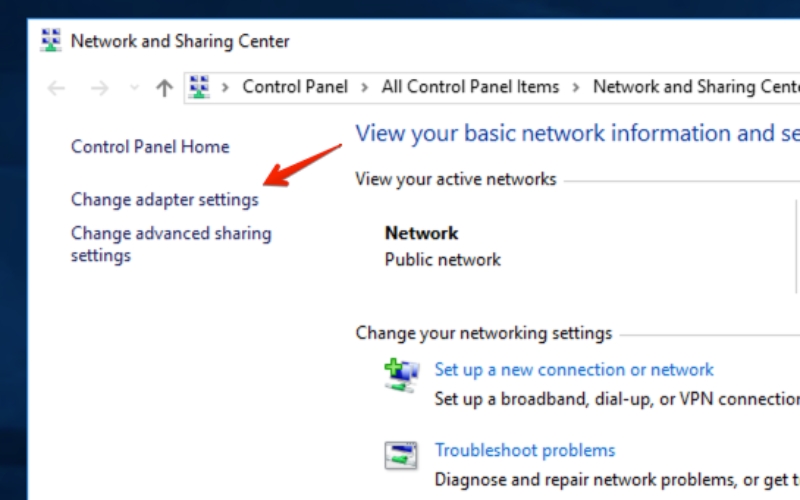
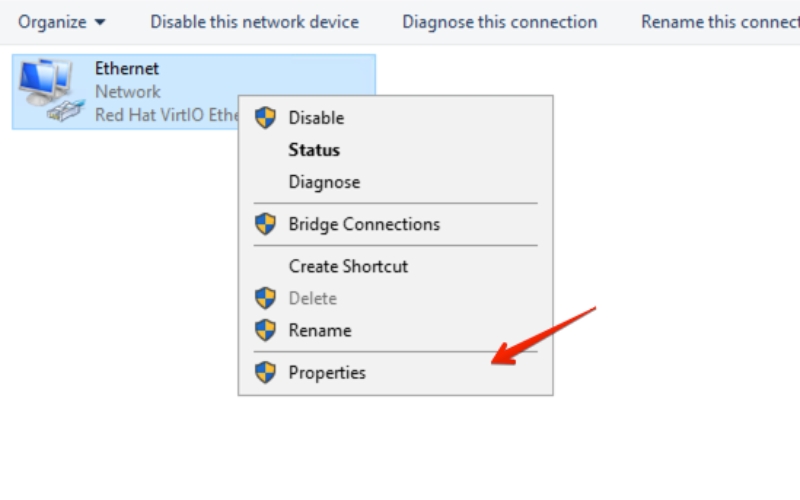
Step 2: Select Open Network and Sharing Center - select Change adapter settings. Then right-click on the icon Computer - select Properties. If you are using Wi-Fi to connect, the signal icon will appear Wi-Fi instead of the image of the network wire.
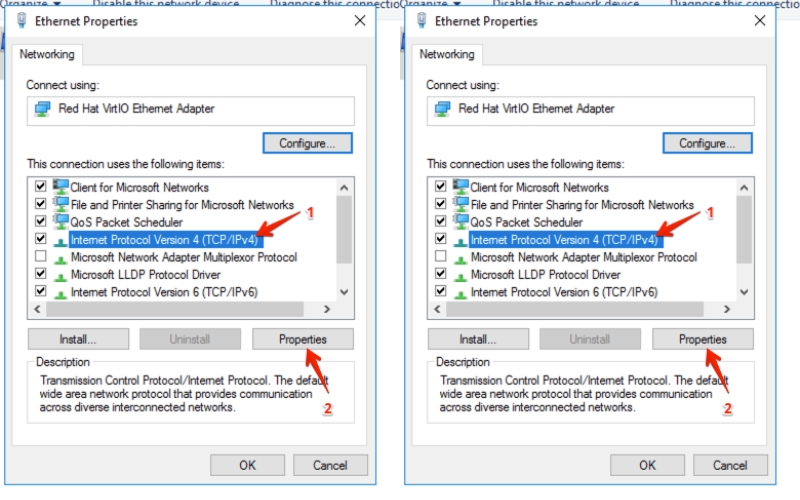
Step 3: Select DNS configuration to block ads on Youtube - click on the text ending in TCP/IPv4 - select Properties.
Step 4: Select Use the following DNS server addresses - change the IP address 103.232.123.88 to block Youtube ads - press OK
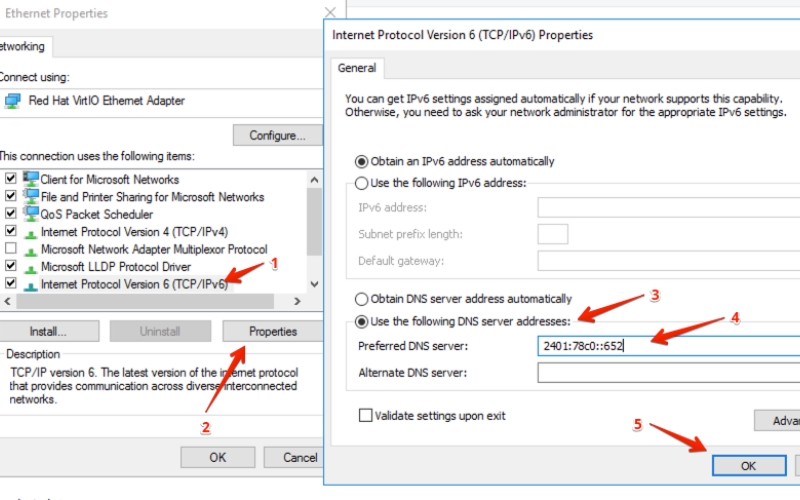
Step 5: After changing DNS for IPv4, continue IPv6 2401:78c0::652 follow these steps:
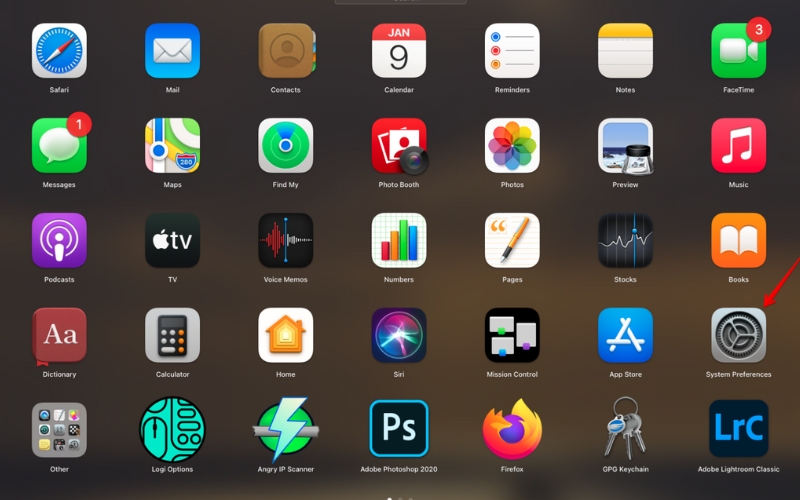
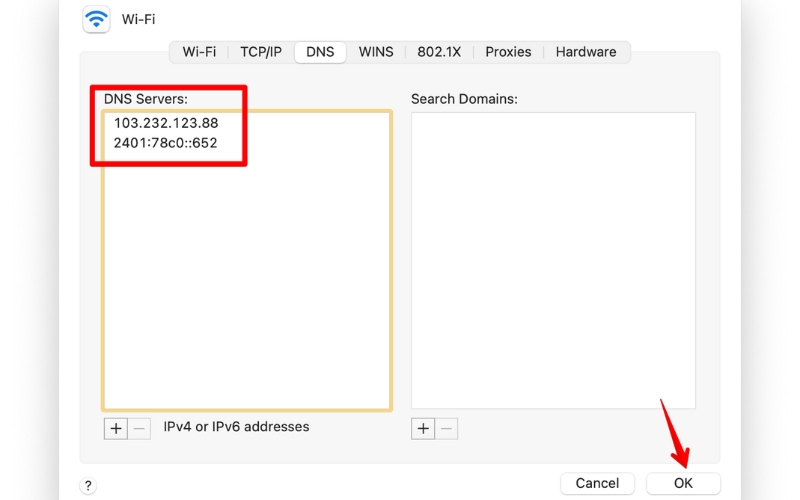
4. How to change DNS to effectively block YouTube ads on Mac
If you are often interrupted while watching YouTube by ads, changing DNS is a quick and effective solution without using third-party software. Below we will guide you to effectively change DNS to block ads on Mac:
Step 1: Visit System Preferences - Select Network
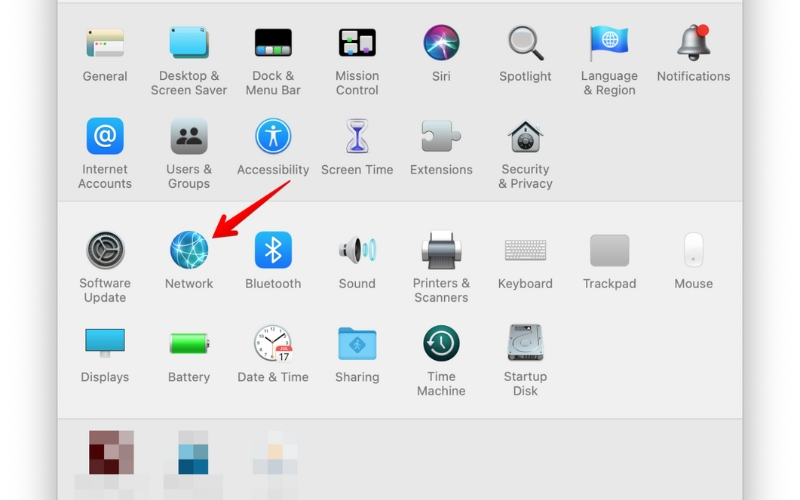
Step 2: Select item Advanced (advanced configuration) from the network configuration interface
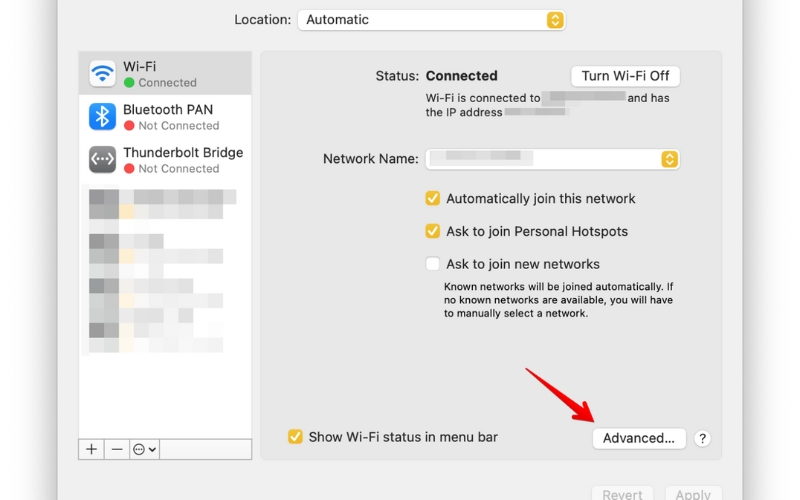
Step 3: Add an ad blocking DNS utility - click the “+” sign in the left corner of the command box and enter the following IP address:
-
Primary DNS IPv4: 103.232.123.88
-
Secondary DNS IPv4: 45.122.221.222
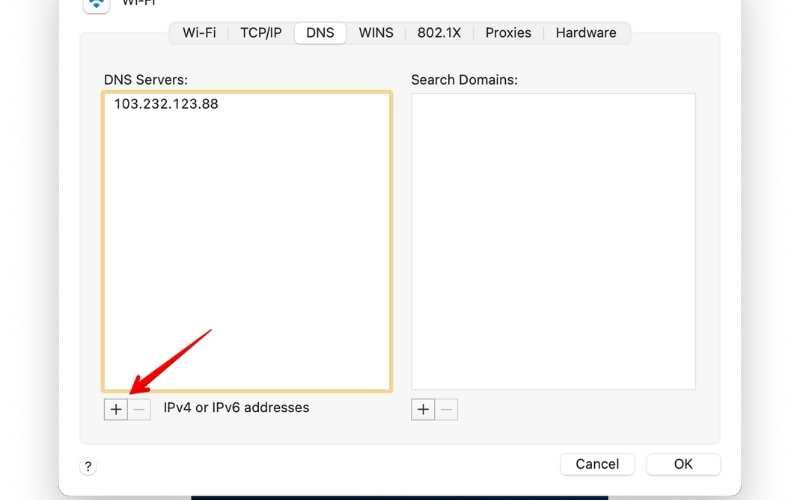
In case you use the device IPv6 you will add a line with the address 2401:78c0::652
Step 4: Select OK - select Apply to complete.
Above is an article with instructions on how to change DNS blocks ads on phones and computers, simple and effective that Hidemyacc has compiled and brought to you. Hopefully the above useful information will help you improve your experience when using utilities on the Internet without being bothered by ads. Wishing you success!
You May Also Like: